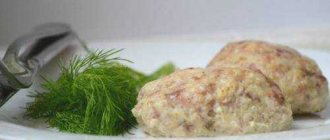
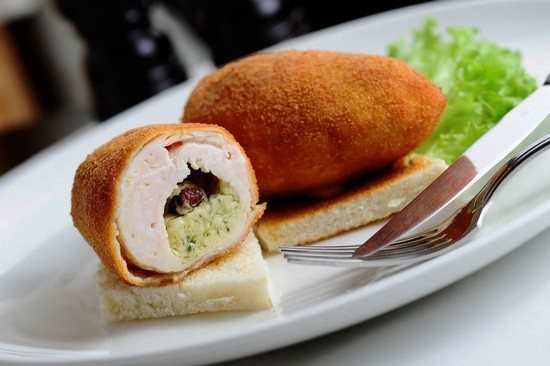
Cutlets are everyone's favorite dish, which often appears on our tables. Today we will talk about a restaurant dish - chicken Kiev.
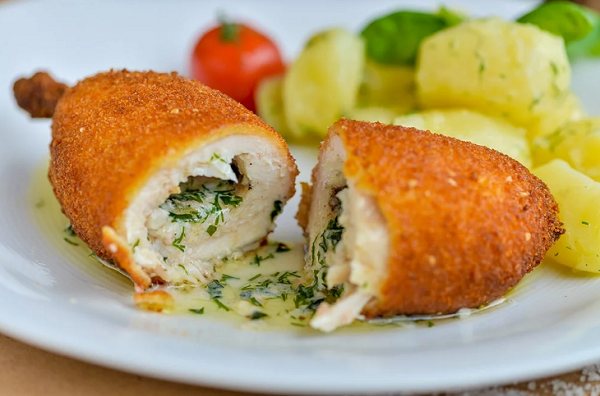
They are prepared from a piece of chicken breast with a bone, which is fried in breading. But that's not all, inside the cutlet there is a surprise - melted aromatic butter, which becomes a kind of sauce for the meat.
It would seem that not every housewife can create such a culinary masterpiece. However, knowing the cooking technology, there is nothing complicated about it. In addition, the dish is budget-friendly - all the ingredients are simple and affordable.
There are several variations of it. Today we will look at the most popular recipes for making chicken cutlets, which are prepared not from minced meat, but from a chopped piece of chicken breast. Inside the cutlet is a tender piece of softened green butter, and on the outside it is covered with a crispy crust of breadcrumbs.
Chicken Kiev with bones - recipe with step-by-step cooking technology
If you want to master a new dish, you can start with the classics. To do this, it’s a good idea to look at the technological map for preparing Kyiv cutlets. It states verbatim the following:
Prepared chicken fillet (rec. No. 101) is stuffed with butter, dipped in eggs, double-breaded in white breading and deep-fried for 5-7 minutes until a crispy crust forms. Bring to readiness in the oven. Cutlets can be served on toast (Rec. No. 431.1). Side dishes - boiled green peas, deep-fried potatoes, a complex side dish.
This dry instruction exists in the form of a memo for cooks. I have provided only a small excerpt. And so it describes not only the process itself, but also the weight of the incoming ingredients. Their exact quantity is written down, everything is literally down to the milligram.
We, home cooks, don’t have to scale like that; it’s important to understand the very principle of preparing a popular dish. Let's get started, and I'll introduce you to the main points during the process.
Ingredients:
- 1 PC. - chicken
- 80 g - soft butter
- 1-2 cloves - garlic
- 3 tbsp. l. - finely chopped greens
- ¼ part - white loaf
- 2 pcs. - eggs
- flour - for breading
- vegetable oil - for frying
- salt - to taste
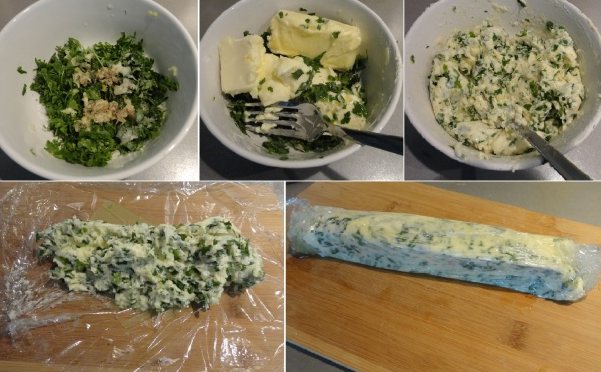
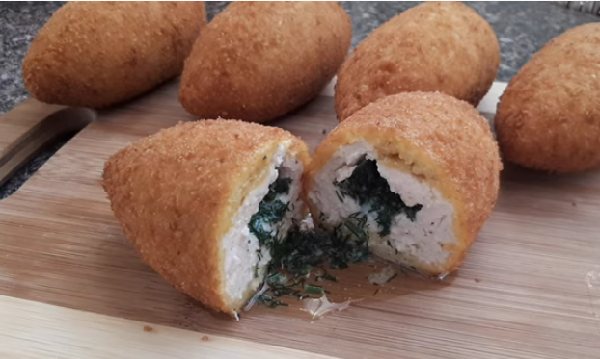
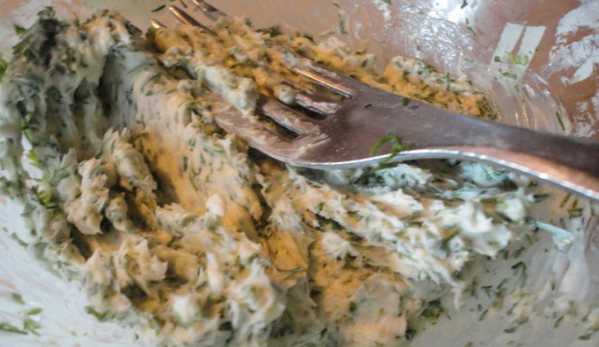
- First you need to prepare the filling. Wash the greens (dill with parsley), dry and chop. Lightly salt and add garlic squeezed through a press. Put softened butter there and knead everything well with a fork.
If you wish, you can add the juice of one lemon or any chopped herbs, such as tarragon or cilantro, to the mixture.
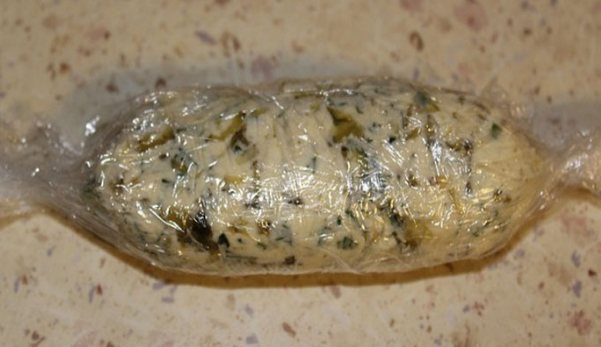
Place it in the form of a sausage on a piece of cling film and put it in the freezer for 1-2 hours.
The oil should freeze well so that it does not leak out of the cutlet when frying.
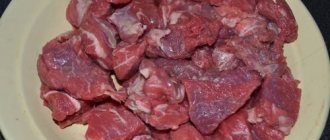
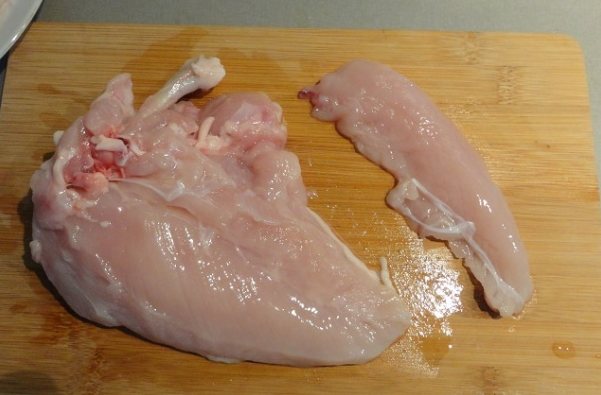
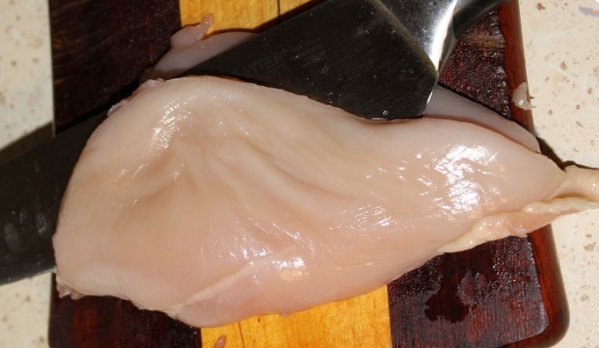
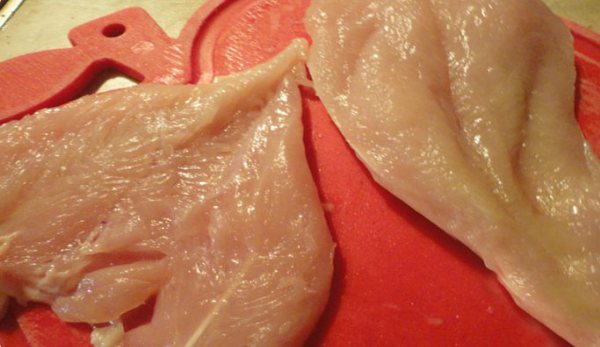
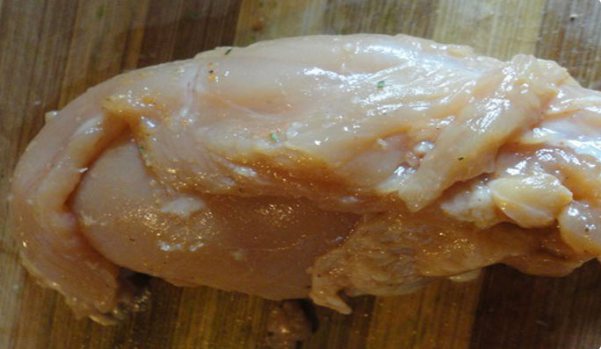
- Let's move on to the main part of preparing the dish - cutting the chicken. We will need chicken breast with a shoulder bone. Therefore, we remove the skin from the carcass, cut off the two outer phalanges from the wings and carefully cut out the remaining shoulder joint along with the chicken breast.
From one carcass you get two breasts with a bone.
It is also necessary to separate the small fillet from the breast (it is easily detected if you carefully examine the breast flesh).
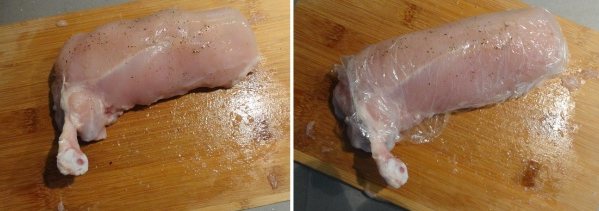
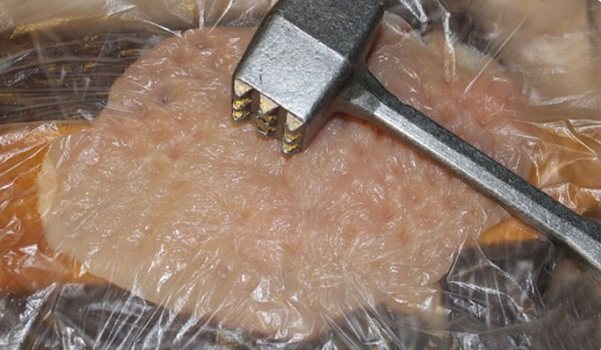
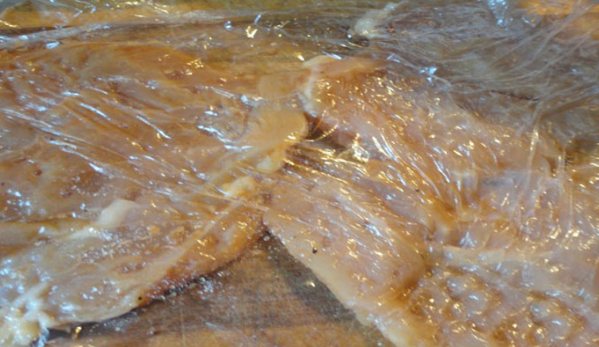
- Now you need to beat the meat with a hammer.
To prevent it from sticking to the cutting board, add cellophane.
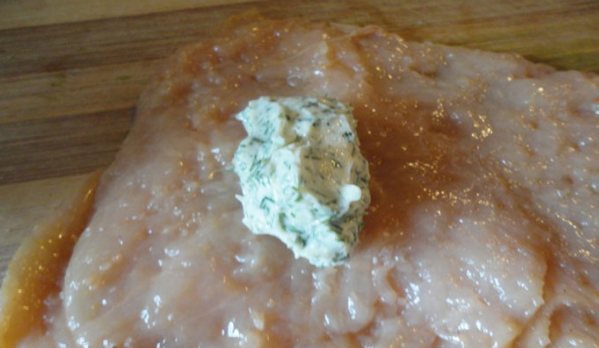
Using gentle movements, pound the meat of the small and large fillets (it will approximately double in size). Salt to taste, and place a piece of hardened butter in the middle of the large fillet. Cover it with a small fillet and roll the cutlet into a tight roll so that there are no gaps on any sides. Because the oil should not leak out during frying.
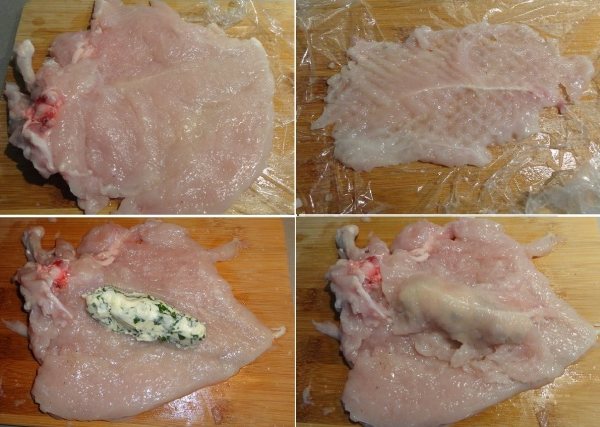
- Wrap the cutlets in cling film and put them in the freezer for 15-20 minutes.
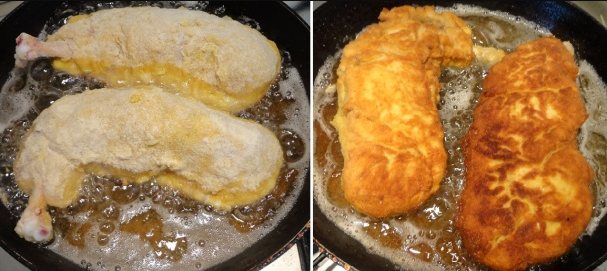
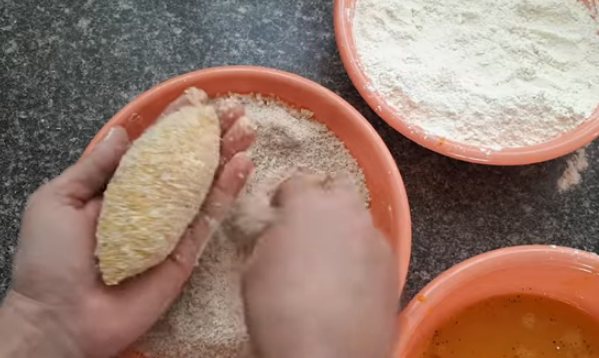
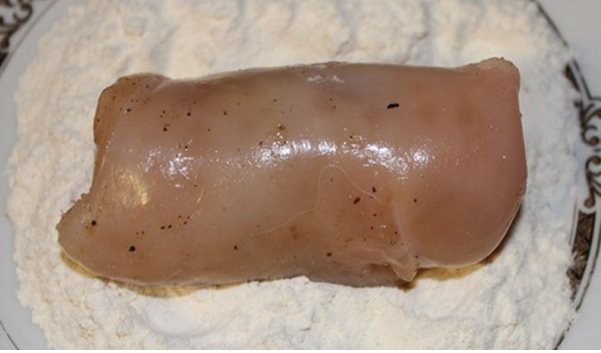
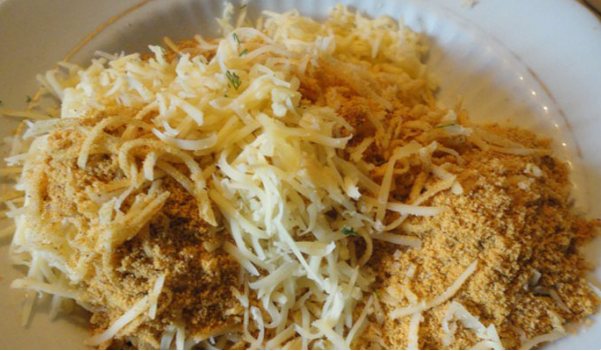
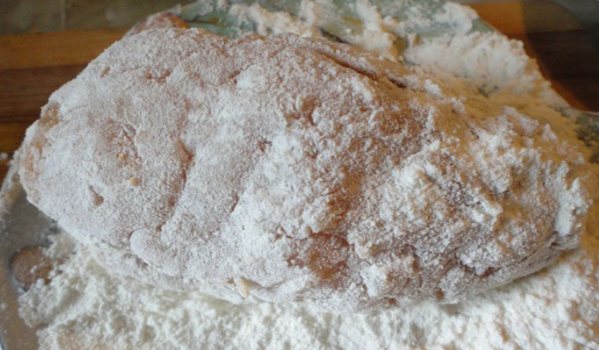
- According to the technological map, the cutlets are coated in double white breading - first in flour, then in egg and then in white bread crumbs.
Prepare breadcrumbs if you don't have them. Cut off the crusts from the loaf pieces and pass the pulp through a blender.
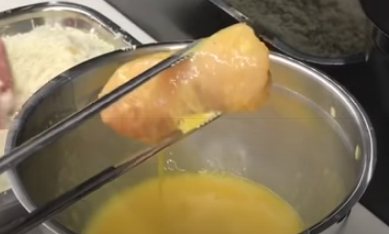
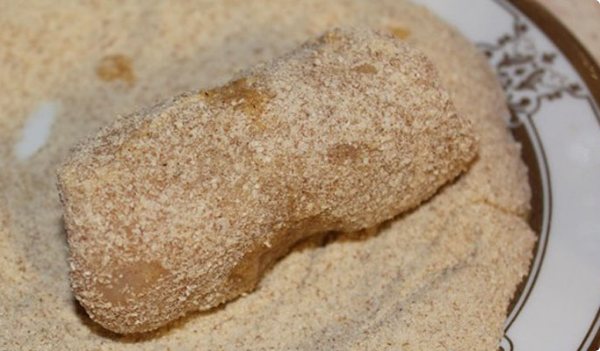
- After this time, roll the cutlets in succession - in flour, in beaten egg and breadcrumbs. Then dip it back into the egg and roll in breadcrumbs. This way you get double breading.
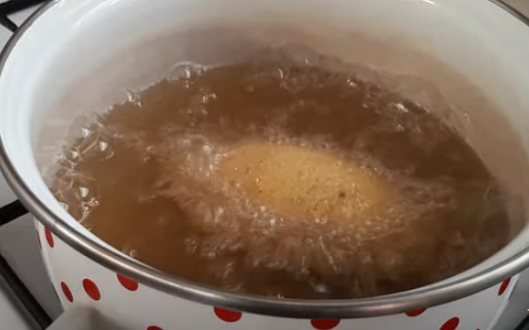
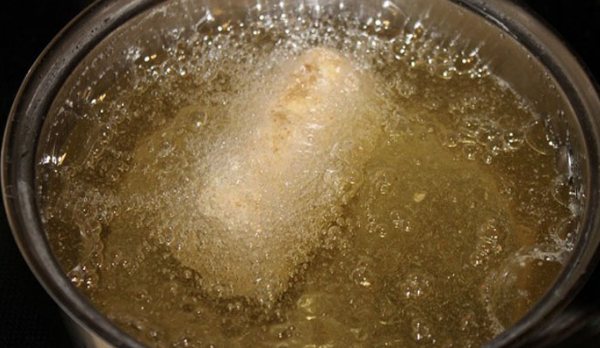
- Pour oil into a frying pan with high sides.
There should be enough of it so that it reaches half of the cutlet (more is possible).
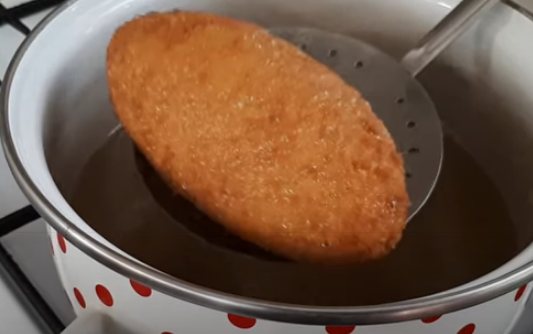
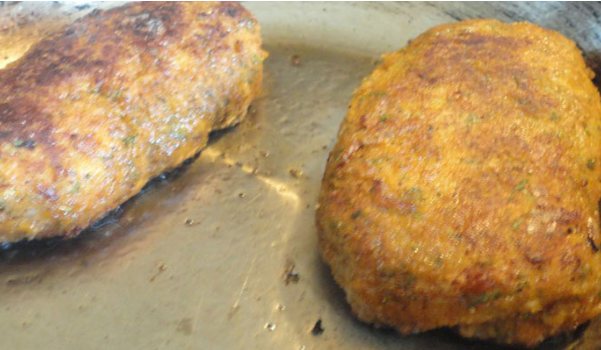
Let's heat it up on the fire. When the oil begins to crackle slightly, lower our cutlets and fry on both sides for 3-4 minutes until golden brown.
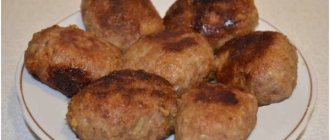
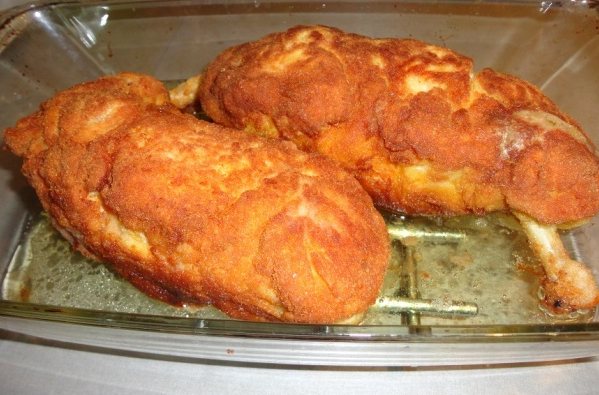
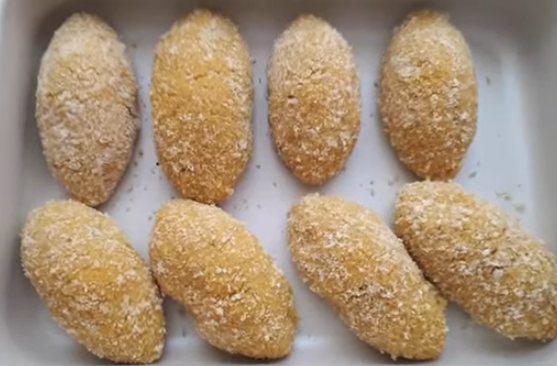
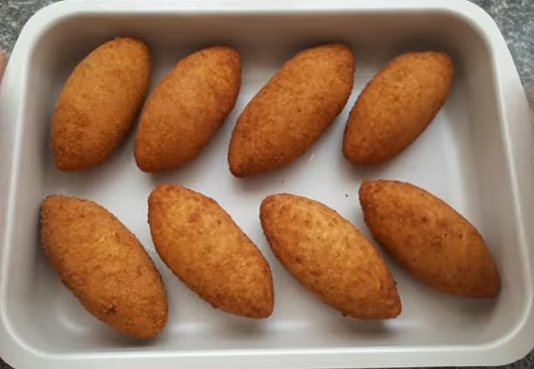
- The cutlets turn out large, so they still need to be baked in the oven. Place on a baking sheet and place in the oven for 5-10 minutes at a temperature of 180-200 degrees.
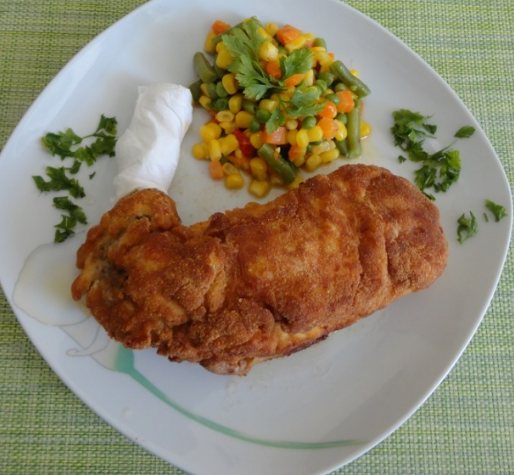
- Serve Kyiv cutlets as soon as you take them out of the oven.
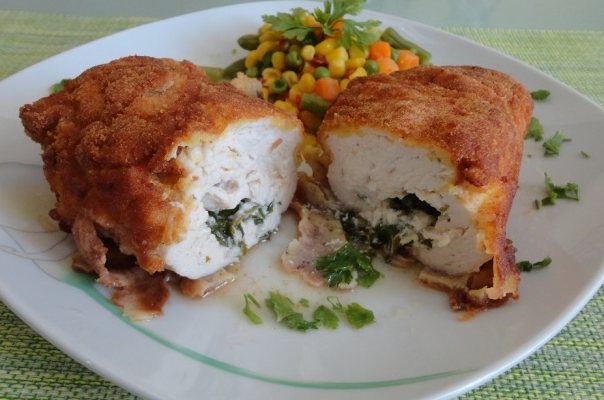
- As a side dish you can put stewed vegetables, mashed potatoes or a salad of fresh vegetables.
To avoid burning your hands, it is better to put a curler on the bone, which can be easily made from a regular paper napkin.
Menu
Share on social networks:
Technological map no. Chicken Kiev, 100 pcs semi-finished culinary product (CP-recipe No. 720
)
Publishing house "Economy", Moscow 1983
- REQUIREMENTS FOR RAW MATERIALS
Food raw materials, food products and semi-finished products used for the preparation of raw chicken Kiev cutlets,
must comply with the requirements of current regulatory and technical documents, have accompanying documents confirming their safety and quality (certificate of conformity, declaration of conformity, quality certificate, etc.).
The preparation of raw materials is carried out in accordance with the recommendations of the Collection of technological standards for public catering establishments and technological recommendations for imported raw materials.
- RECIPE
| Name | Raw material consumption per serving, g | ||||
| Gross weight, g | % when cold processed | Net weight, g | % during heat treatment | Output, g | |
| Cleaned chicken fillet (cleaning act) | 10000,0 | 3.00 (stack) | 9700,0 | 0,00 | 9700,0 |
| Salt | 300,0 | 0,00 | 300,0 | 100,00 | 0,0 |
| Ground black pepper | 20,0 | 0,00 | 20,0 | 100,00 | 0,0 |
| Butter | 2200,0 | 10.00 (portioning loss) | 2000,0 | 0,00 | 2000,0 |
| Dill, peeled. p/f | 200,0 | 0,00 | 200,0 | 0,00 | 200,0 |
| Salt | 100,0 | 0,00 | 100,0 | 100,00 | 0,0 |
| Eggs | 30 pcs | 25.00 (loss during breading) | 1125,0 | 0,00 | 1125,0 |
| Wheat flour | 700,0 | 25.00 (losses during breading and sifting) | 525,0 | 0,00 | 525,0 |
| Breadcrumbs, semi-finished | 2000,0 | 25.00 (losses during breading and sifting) | 1500,0 | 0,00 | 1500,0 |
| Exit | 100 pieces. x 150 g | ||||
- Cooking technology
The cleaned chicken fillet is portioned into pieces weighing 100 g, beaten under film into a layer 5-6 mm thick. Season with salt and ground black pepper.
Dill greens are finely chopped with a knife. The softened butter is combined with dill and mixed until the ingredients are evenly distributed in the mass. Wrap in cling film in the form of a sausage. Place the sausages on a baking sheet. Freeze. Then the film is unrolled. The sausage is weighed and cut by weight into cutlets weighing 20-21 g.
Breadcrumbs are sifted.
The prepared chicken fillet is stuffed with green oil, rolled into oval-shaped pieces, and placed in the refrigerator for 30-40 minutes at a temperature of +2+4* C.
Breaded in flour, dipped in eggs, then in breadcrumbs. Use your hands to give the products an oval shape, and at each stage of breading, press the breading mass against the cutlet blank. After each breading, the crackers are sifted so that there are no sticky lumps.
The semi-finished cutlets are placed on a baking sheet. Freeze in a blast freezer at a temperature of minus 30-25* C.
The finished cutlets are placed in a vacuum bag, 10-20 pieces each. They are evacuated with a “hard” vacuum and marked (name of semi-finished products, quantity, date and time of production).
- Characteristics of the finished dish, semi-finished product.
Appearance
– oval-shaped cutlets made from pounded chicken fillet, stuffed with green butter, double-breaded in white.
Taste
– typical for frozen chicken cutlets, green butter and white breading. No foreign taste.
Smell
– typical for frozen chicken cutlets, green butter and white breading. No foreign smell.
- Requirements for registration, sale and storage.
Deep-frozen semi-finished poultry products are stored at a temperature not exceeding minus 18º C and relative humidity from 85% to 95%:
- using a vacuum or modified atmosphere - no more than 2 months.
Semi-finished chicken Kiev
must comply with the requirements of SanPin 42-123-4117-86
:
| Indicator name | Indicator value | |
| Number of mesophilic aerobic and facultative anaerobic microorganisms, CFU/g, no more | 1x10⁵ 1x10⁶ ⃰⃰ | |
| Product weight (d), in which there is no allowed: | Coliform bacteria (coliform bacteria) | 0,0001 |
| Pathogenic microorganisms, incl. salmonella | 25 | |
| Listeria monocytogenes | 25 | |
| Mold, CFU/g, no more | 500 | |
| Note – ⃰ for semi-finished meat and bone products, boneless, breaded, with spices, marinated and chopped, stuffed; – the “Mold” indicator is determined in chopped, stuffed semi-finished products with a shelf life of more than 1 month | ||
- NUTRITIONAL VALUE of chicken Kiev, semi-finished product:
| Proteins, g | Fats, g | Carbohydrates, g | Calorie content, kcal | |
| For 1 piece x 150 g | 26,43 | 19,93 | 16,40 | 348,14 |
| Per 100 g | 17,62 | 13,29 | 10,93 | 232,09 |
date
Technologist /______________/__________full name___________
Chef /______________/_________ Full name___________
Share on social networks:
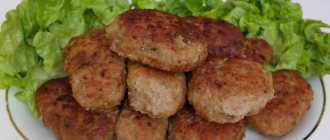
Homemade Kiev cutlets from minced chicken in the oven
Despite the fact that in the classic version, Kiev cutlet should be prepared from chicken chop, some housewives prepare the dish from minced meat.

The idea remains the same - a piece of green aromatic butter is placed inside the minced meat and the cutlet turns out incredibly tender and juicy.
Ingredients:
- 1 kg - chicken breast
- 1 tbsp. - torment
- 7-8 pcs. - eggs
- 150 g - butter
- 40 g each - dill and parsley
- 0.5 pcs. - lemon
- 3 cloves garlic (optional)
- 1 loaf - for breadcrumbs
- salt, spices - to taste
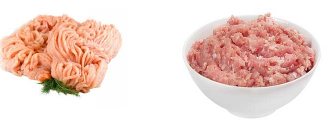
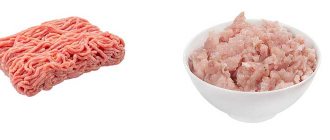
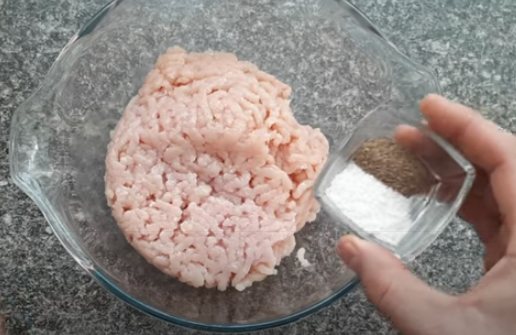
- Cut the chicken fillet into pieces so that you can roll them through a meat grinder. Add 1 tsp to the minced meat. salt and 0.5 tsp. ground black pepper. Mix and cover with cling film, place the minced meat in the refrigerator.
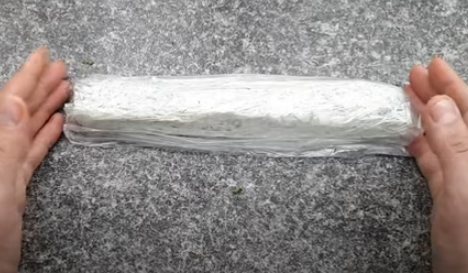
- In the meantime, prepare the filling. Chop the greens. If you wish, you can add crushed garlic cloves. Add all this to the softened butter. Mix thoroughly with a fork and transfer the mixture into a bag. Form a sausage with your hands. In this form we send it to the freezer.
- When the butter freezes, cut it into pieces and you can start making cutlets. Take a handful of minced meat and flatten it in your hands or on a board into a flat cake. To make work easier, you should wet your hands in water. Place a piece of hard butter in the middle of the flatbread and seal the edges well with minced meat around it.
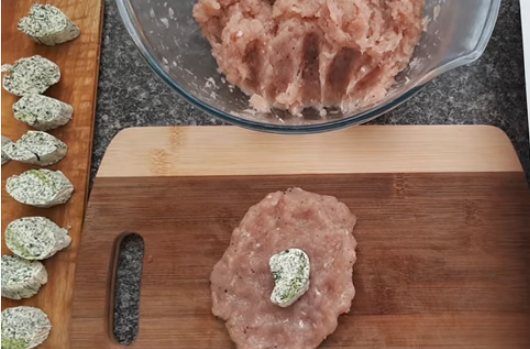
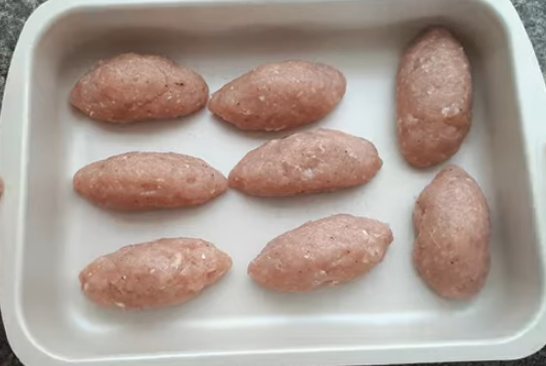
- We form the cutlets with the filling in this way and place them on a flat surface - a board or baking sheet that can easily fit in the freezer. We remove it so that the semi-finished products freeze for 20-25 minutes.
- Then bread the cutlets in the following order: flour, egg, crackers and again egg, crackers.
- Again, place the cutlets in the freezer for a while. In the meantime, let’s heat the vegetable oil in a deep bowl.
- The oil is well heated, drop one cutlet at a time and start frying for 2-3 minutes.
- Do not fry too much, just until golden brown.
- Preheat the oven to 200 degrees and send for another 10 minutes to bring the dish to full readiness.
Juicy and tasty, with aromatic filling inside, the cutlets are ready, enjoy!
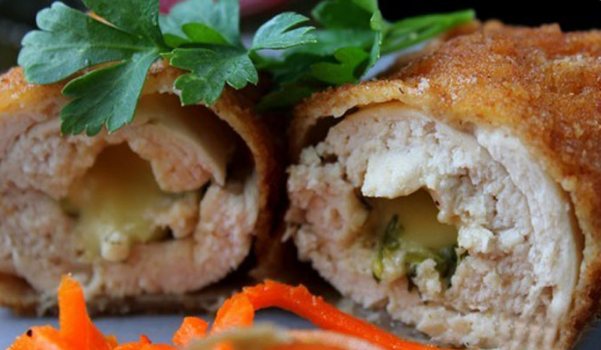
Kyiv chicken fillet cutlets with cheese, fried in oil in a frying pan
Here, inside the cutlet, in addition to butter and herbs, a piece of hard cheese is placed. Chicken meat goes well with this product. You can use not only hard cheese as a filling, but also processed cheese.
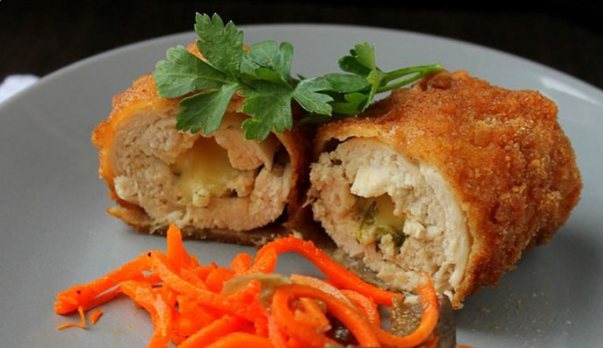
For a piquant taste, I suggest adding grated pickled cucumber to the filling.
Ingredients:
- 2 pcs. - chicken breasts
- 2 pcs. - eggs
- 2 pcs. - pickled cucumbers
- 2-3 cloves - garlic
- a small bunch of dill and parsley
- 100 g - white breadcrumbs
- 100 g - flour
- 100 g - cheese
- refined vegetable oil - for deep frying
- salt and pepper - to taste
- Let's prepare the butter for the filling. It should be removed from the refrigerator in advance to soften it. Add to it: chopped dill and parsley, garlic cloves passed through a press, grated pickled cucumbers. Add salt if necessary.
- Stir with a fork until smooth and place in cellophane, forming it into a sausage shape. We put it in the freezer.
- For now, let's start cutting up the chicken fillet. We free the breasts from fat and films, if any. Cut each breast in half lengthwise, as shown in the photo.
- Now beat each piece with a hammer so that you can wrap the filling in it. Try to make the edges thinner, but don’t get too carried away, the flesh should remain intact without tears.
To avoid splashes and avoid having to wash the board and hammer afterwards, place the meat in plastic.
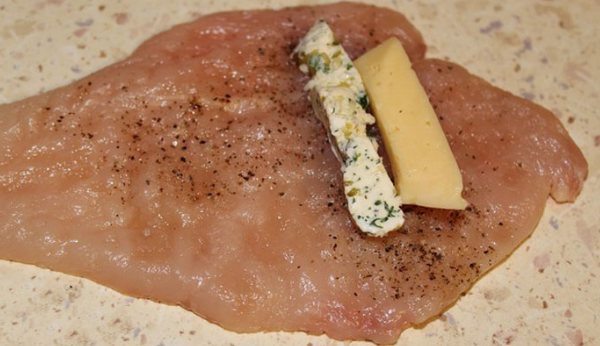
- Season the chopped chicken breasts with salt and pepper. On the edge of each piece we place a piece of frozen sausage butter, and next to it a piece of hard cheese. Wrap the filling in an envelope so that it ends up inside the cutlet.
- First bread the resulting envelopes in flour. The amount of flour that sticks to the roll is enough.
- Then place them in beaten raw eggs, dipping the cutlet from all sides. It is convenient to turn it over with special tongs or two forks.
- Next, place in breadcrumbs. Since the classic version should be double breaded, we again send the cutlet into the eggs and then into the breadcrumbs. Let's put the fully prepared semi-finished products in the freezer for a while.
- Heat the vegetable oil in a deep bowl and fry our cutlets in it until cooked - about 10-15 minutes.
The fire should not be too strong so that the cutlets do not burn.
They should turn out golden brown, with a crispy golden crust.
- Serve delicious and appetizing cutlets with any vegetable side dish. As an appetizer, you can add Korean carrots to the dish.
Delicious chicken Kiev cutlets with cheese breading
I bring to your attention another interesting recipe for chicken Kiev. What distinguishes them from previous options is the breading. It is prepared with the addition of cheese, giving the dish a slight piquancy.
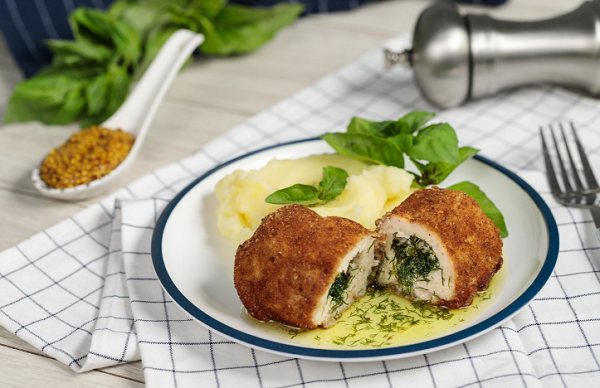
The peculiarity of this option is the preliminary marinating of the meat, which makes it incredibly tasty and juicy.
Ingredients:
- 4 things. - chicken breast
- 2-3 pcs. - eggs
- 2-3 cloves - garlic
- 50 g each (for breading) - cheese, flour, crackers
- 30 g - butter
- bunch of dill
- 3 tbsp. l. - soy sauce, lemon juice
- 1 tbsp. l. - vegetable oil + for frying
- 1 tsp each - honey and tomato paste
- ground black pepper and chili, salt to taste
- We cut the chicken breast in half lengthwise, without cutting all the way to the end, so that it looks like an open page. In addition, each breast has a small fillet, which is immediately separated from it. We also cut it in half lengthwise, not completely. Thus, we will get 4 large cutlets and 4 small ones.
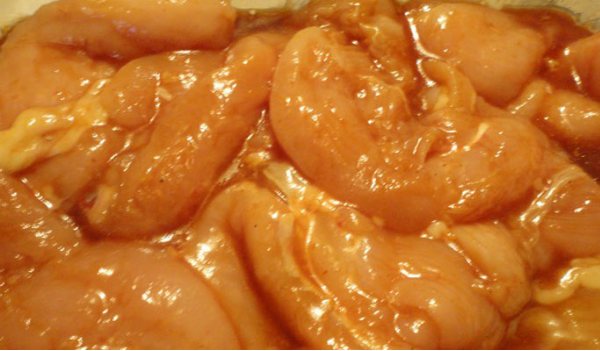
- Let's prepare the marinade for the meat. Mix soy sauce, vegetable oil, honey and tomato paste. Add chopped garlic and ground peppers. Mix well and add chicken pieces to marinate in the sauce.
- Since the breasts are already cut, they are not thick and will marinate in an hour. We take them out onto polyethylene, cover the top with film and beat them with a hammer so that the pieces become larger and thinner without causing tears.
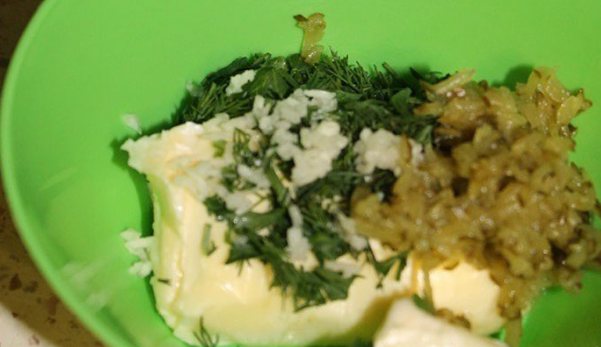
- We cut off thick branches from the dill and chop the rest. Leave about half for the filling, and set aside the other half for breading. Mix softened butter with half the dill and mash with a fork until a homogeneous mixture is obtained.
- Let's prepare the breading: in a separate bowl, mix half the chopped dill, finely grated cheese and breadcrumbs.
- We begin to form cutlets. For each piece of meat, place the filling closer to the edge and wrap it in a roll like an envelope so that there are no holes left.
Since our cutlets will be of different sizes, make the filling the appropriate size. For larger cutlets, add a slightly larger ball of green butter.
- The filling should be tightly packed in an envelope so that there is no chance of oil spilling out of it during frying.
- Let's move on to the breading. First, roll the cutlet in flour, then dip it into eggs beaten with a fork and finally roll it well in crumbs of white breadcrumbs with cheese and herbs.
Compact the last breading layer with your hands, lightly pressing the cutlet with your palms.
- Next, we’ll put our semi-finished products in the freezer so that the piece of green butter in them completely hardens (for 20-25 minutes).
- After this time, heat the frying pan with a small amount of oil. Over high heat, brown the cutlets briefly until the cheese coating sets. Literally half a minute on each side. Then reduce the heat to low and, covering the pan with a lid, fry for another 10-15 minutes, remembering to turn the cutlets from one side to the other.
If desired, instead of frying in a frying pan, you can bake the products in the oven. To do this, heat it to 180 degrees, place them on a greased baking sheet and bake for 30-35 minutes. Small cutlets will be ready earlier; they will bake in literally 10-15 minutes.
Sauce for chicken Kiev
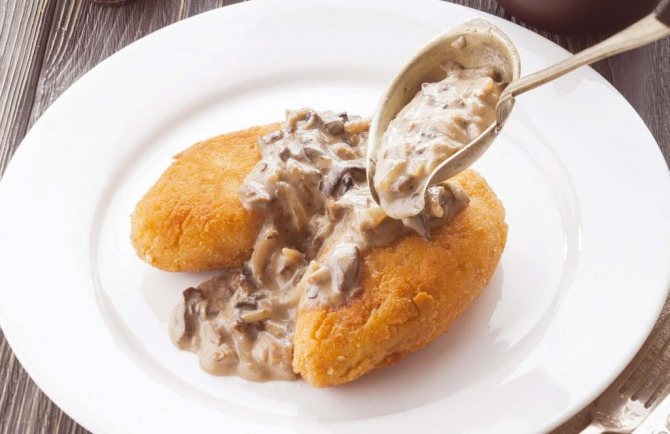
Kiev cutlets can be eaten with various sauces and even just with ketchup or sour cream.
I love the creamy mushroom sauce because mushrooms always pair perfectly with chicken.
You will need:
- champignons - 300 g;
- butter - 25 g;
- flour - 2 tbsp. spoons;
- cream - 300 g;
- salt, black pepper.
Preparation method:
- Chop the mushrooms and fry them in butter.
- Add flour, mix.
- Pour in the cream and cook the sauce until thick. Add salt and pepper.
This sauce also makes very tasty potato zrazy with different fillings.
How to fry semi-finished Kyiv cutlets?
A few tips for those housewives who decide to prepare cutlets for future use - freeze them in the freezer. If you have made more semi-finished cutlets than you need for one-time use, the most reasonable option would be to freeze them. Since reheating Kyiv cutlets will lose the flavor of this dish - the oil will be absorbed into the meat, and the breading will not be crispy.
Therefore, place the cutlets on a flat surface, for example, a cutting board, spread cellophane under them and place them in the freezer. After half an hour, remove the frozen products and place them in a container or freezer bag.
And the main rule: semi-finished products do not need to be defrosted before cooking. Immediately place the cutlets in the preheated fryer and fry over moderate heat. To be on the safe side, you can finish it in the oven.
Calorie content and nutritional value of cutlets
A few words about the nutritional value and calorie content of the dish. According to the technological map, the calorie content of classic Kiev cutlets is 344.84 kcal.
- proteins - 15.82 g
- carbohydrates - 27.16 g
- fats - 15.93 g
The dish is quite high in calories, but sometimes you can treat yourself and your guests to such a wonderful and original treat.
A dish with worldwide popularity
Cooking chicken Kiev has many interpretations. Traditionally, this meat dish is usually prepared from juicy and fresh chicken breast. Filling: butter. The cutlets are deep-fried and then baked in the oven. The filling will indicate the readiness of the cutlets: when the meat is broken, the oil should flow out.
Chicken Kiev used to be cooked on the bone. This was done solely for convenience, since it is customary to eat the dish with your hands. But such a process of preparing world-famous cutlets is considered painstaking, time-consuming, and also expensive.
Video from Ilya Lazerson on how to properly prepare classic chicken Kiev
In its classic form, it is a cutlet with a bone that resembles a chicken leg in appearance. This is the form in which the famous dish is served in the restaurant.
I suggest watching a video from the famous chef Ilya Lazerson, from which you will learn how to create this masterly dish at home. I have no doubt that you will want to repeat the whole process in your kitchen, because there is nothing complicated about it!
I hope today’s recipes will be useful to you, and you will confidently go to the kitchen to prepare delicious and appetizing Kyiv cutlets. Now you know how to do it and even if you take them for the first time, you will succeed. Thanks to the step-by-step description and video, it’s not difficult to repeat everything. Good luck and come back for new interesting recipes.
Friends, I’m always glad to see you on the pages of my blog, write comments, vote with stars, share your favorite materials with your friends by clicking on the social buttons, bookmark interesting recipes so as not to lose them. Best regards, Love.